
Thank you very much for the translation
Angela

Thank you very much for the translation
Pinuccia

Thank you very much for the translation
Pinuccia


This tutorial is written in PSP x8
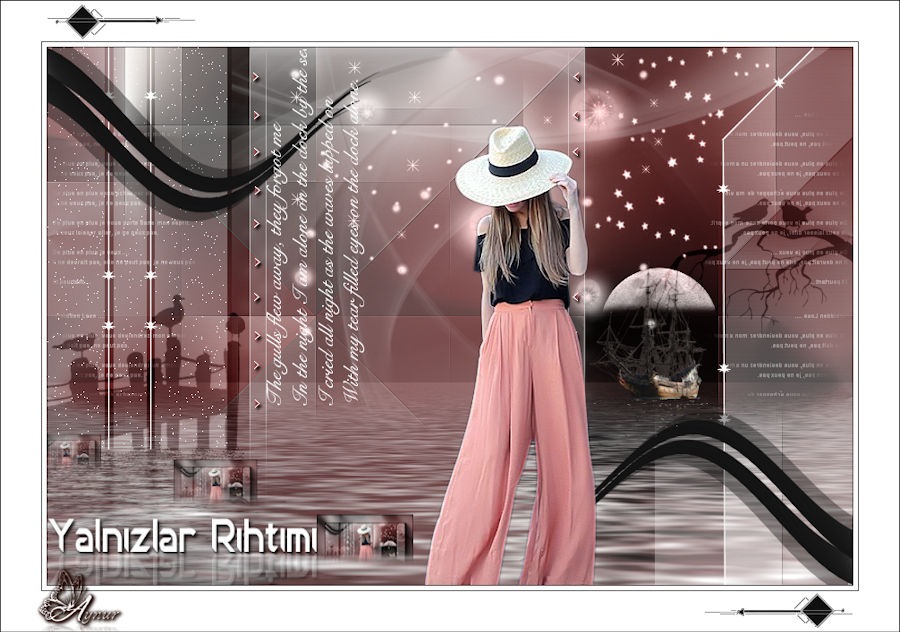
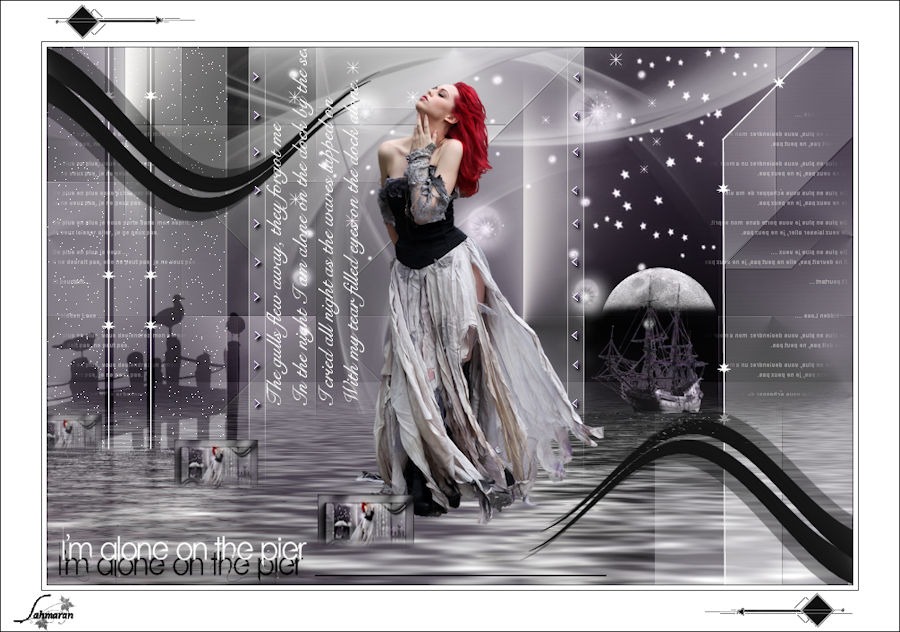
Tube
Tube_Woman_Colors_GB_61
Mary 0812-98
LB Tubes
Plugins
Flaming Pear
Mehdi – Sorting Tiless
Simple - Pizza Slice Mirror
Alien Skin Eye Candy : 5 Impact – Perspective Shadow
Text
aslı/Şahmaran
Download Link
Preparation:
Choose a light and a dark color from your tube
Properties Foreground; set your Foreground color to #9a1e2e
Properties Background; set your Background color to #000000

Properties foreground: Make a foreground- background Gradient of these two colors
Note: When working with your own colors, play with the Blend Mode and/or Opacity at your own discretion
File / New - Open 900 x 600 Transparent Image
Flood fill - Fill With your Gradient - Hy-Gradient - Hy-Yalnızlar Rıhtımı-Grd


Effects - Image Effects - Seamles Tiling

Let's close both eyes and continue raster 1
Effects - Flaming Pearl -Hy-Yanlızlar Rıhtımı- Flood

Effects - Mehdi - Sorting Tiles

Effects - Edge Effects - Enhance
Selections - Load/Save Selections - Load Selection From Disk – Hy-Yalnızlar Rıhtımı-Sell
Press the delete key on the keyboard 6+7 Times
Selections - Select None
Layer Palette - Double click on this Layer and set the Blend Mode to "Soft Light"
Copy (2) of Raster Let's open 1 eye and continue from there.
Effects - Simple - Pizza Slice Mirror
Effects - Edge Effects - Enhance More
Layer Palette - Double click on this Layer and set the Blend Mode to "Soft Light"
Selections - Load/Save Selections - Load Selection From Disk – Hy-Yalnızlar Rıhtımı-Sell
Press the delete key on the keyboard 4 Times
Selections - Select None
Layers – New Raster Layer
Flood fill - Fill With your Foreground color #ffffff
Open - Hy Mask - Hy-Yanlızlar Rıhtımı - Mask
Layers - New Mask Layer - From Image – Hy-Yanlızlar Rıhtımı - Mask

Layers - Merge - Merge Group
Activate Pick Tool  and place it like this
and place it like this
Layers Palette Opacity 48
Layers – New Raster Layer
Flood fill - Fill With your Foreground color #ffffff
Open - Hy Mask - Hy-Yanlızlar Rıhtımı - Mask
Layers - New Mask Layer - From Image – Hy-Yanlızlar Rıhtımı - Mask-1
Layers - Merge - Merge Group
Activate Pick Tool and place it like this
and place it like this
Layers – New Raster Layer
Flood fill - Fill With your Foreground color #ffffff
Open - Hy Mask - Hy-Yanlızlar Rıhtımı - Mask
Layers - New Mask Layer - From Image – Hy-Yanlızlar Rıhtımı - Mask-2
Layers - Merge - Merge Group
Layer Palette - Double click on this Layer and set the Blend Mode to "Luminance (Legacy)"
Activate Pick Tool and place it like this
and place it like this
Open - Hy_Text - Hy-Yanlızlar Rıhtımı-Text
Edit / Copy
activate your work
Edit / Paste as New Layer
Activate Pick Tool and place it like this
and place it like this
Layer Palette - Double click on this Layer and set the Blend Mode to "Normal"Opacity 37
Open - Hy_Deko - Hy-Yanlızlar Rıhtımı-Deko
Edit / Copy
activate your work
Edit / Paste as New Layer
Activate Pick Tool and place it like this
and place it like this
Open - Hy_Deko - Hy-Yanlızlar Rıhtımı-Deko-1
Edit / Copy
activate your work
Edit / Paste as New Layer
Activate Pick Tool and place it like this
and place it like this
Open - Hy_Deko - Hy-Yanlızlar Rıhtımı-Deko-2
Edit / Copy
activate your work
Edit / Paste as New Layer
Open - Hy_Deko - Hy-Yanlızlar Rıhtımı-Deko-3
Edit / Copy
activate your work
Edit / Paste as New Layer
Activate Pick Tool and place it like this
and place it like this
Open - Hy_Deko - Hy-Yanlızlar Rıhtımı-Deko-4
Edit / Copy
activate your work
Edit / Paste as New Layer
Activate Pick Tool and place it like this
and place it like this
Layer Palette - Double click on this Layer and set the Blend Mode to "Luminance (Legacy)"
Open - Hy_Deko - Hy-Yanlızlar Rıhtımı-Wharf
Edit / Copy
activate your work
Edit / Paste as New Layer
Activate Pick Tool and place it like this
and place it like this
Open - Hy_Deko - Hy-Yanlızlar Rıhtımı-Ship
 Open - Hy_Deko - Hy-Yanlızlar Rıhtımı-Bird
 Layer Palette - Double click on this Layer and set the Blend Mode to "Soft Light"
Edit / Copy
activate your work
Edit / Paste as New Layer
Activate Pick Tool and place it like this
and place it like this
Edit / Copy
activate your work
Edit / Paste as New Layer
Activate Pick Tool and place it like this
and place it like this
Open - Hy_Text - Hy-Yanlızlar Rıhtımı-Text-1
 Open - Hy_Text - Hy-Yanlızlar Rıhtımı-text-2


 Edit - Copy


Edit / Copy
activate your work
Edit / Paste as New Layer
Activate Pick Tool and place it like this
and place it like this
Edit / Copy
activate your work
Edit / Paste as New Layer
Activate Pick Tool and place it like this
and place it like this
Open - Hy_Tube - Tube_Woman_Colors_GB_61
Edit / Copy
activate your work
Edit / Paste As New Layer
Image - Resize - 75%
Activate Pick Tool and place it like this
and place it like this
Edit - Copy Special - Copy Merged
Edit - Paste As New Image
Image - Resize - 15%
Effects - AAA Frames - Foto Frame

Edit / Paste as New Layer
Again - Image - Resize - 80%
Effects - Mu'Ras Meister - Copies

Activate Pick Tool and place it like this
and place it like this
Selections - Load/Save Selections - Load Selection From Disk – Hy-Yalnızlar Rıhtımı-Sell-1
Press the delete key on the keyboard 2 Times
Selections - Select None
Edit - Copy Special - Copy Merged
Open - Hy_Deko - Hy-Foto Frame
Edit - Paste Into Selection
Selections - Select None
Put Your Watermarkt
Image - Resize 900
Save JPEG
Image - Resize 900
Save JPEG


Test çalışmaları için Aynur,a Teşekkür Ederim
Test çalışmaları için Aslı,ya Teşekkür Ederim


Test çalışmaları için By Yusuf,a Teşekkür Ederim


Thank you very much to the translators


Thank you very much to everyone for these nice versions


Hiç yorum yok:
Yorum Gönder