This tutorial is written in PSP x8 Thank you very much for the translation
Angela
Mask
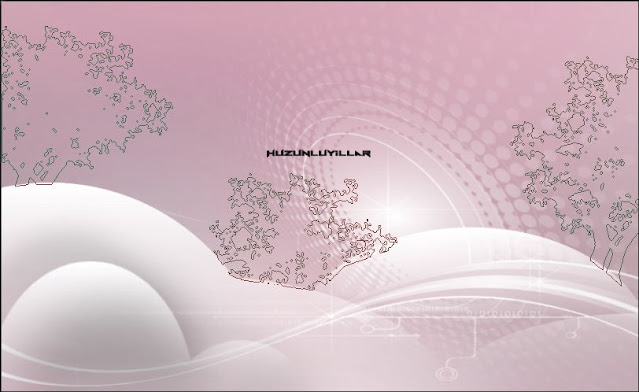
Hüzünlüyıllar
Plugins
Alien Skin Eye Candy : 5 Impact
Preparation:
Choose a light and a dark color from your tube
Properties Foreground; set your Foreground color to #FFFFFF
Properties Background; set your Background color to #d7adbb
Properties foreground: Make a foreground- background Gradient of these two colors Note: When working with your own colors, play with the Blend Mode and/or Opacity at your own discretion
NOTE:You can change it as in the example for different color work.
Adjust - Hue And Saturation
Hue Saturation/Lightness
File / New - Open 900 x 550 Transparent Image
Selections - Select All
Open – Hy-Image Backgraund - Hy_Welcome2022_Backgraund
Edit / Copy
Activate your work
Edit - Paste into selections
Selections - Select None
Layers – New Raster Layer
Flood fill - Fill With your Foreground color #FFFFFF
Open - Hy Mask - Hüzünlüyıllar_mask_1
Layers - New Mask Layer - From Image – Hüzünlüyıllar_mask_1
Layers - Duplicate
Layers - Merge - Merge Group
Layers – New Raster Layer
Selections - Load/Save Selections - Load Selection From Disk – Hy_Welcome2022_sell
Flood fill - Fill With your Gradient Corel_06_028 Fading white
Selections - Select None
Layers – New Raster Layer
Selections - Load/Save Selections - Load Selection From Disk – Hy_Welcome2022_sell_1
Flood fill - Fill With your Gradient Corel_06_028 Fading white
Effects - 3D Effects - Drop Shadow
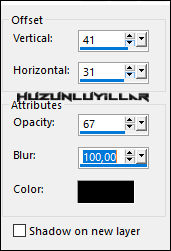
Effects - 3D Effects - Drop Shadow
Selections - Select None
Layers – New Raster Layer
Selections - Load/Save Selections - Load Selection From Disk – Hy_Welcome2022_sell_2
Flood fill - Fill With your Gradient Corel_06_028 Fading white
Selections - Select None
Flood fill - Fill With your Background color #FFFFFF
Layers – New Raster Layer
Activate the Brush Tool - Paint Brush - Hy-Tree-Brush

Flood fill - Fill With your Foreground color #FFFFFF
Layers – New Raster Layer
Activate the Brush Tool - Paint Brush - Hy-Cloudy-Brush
Open – Hy- Tube - Hy_Tree
Edit / Copy
Activate your work
Edit / Paste as New Layer
Activate Pick Tool

and place it like this
Open – Hy- Tube - sapins-coly
Edit / Copy
Activate your work
Edit / Paste as New Layer
Activate Pick Tool
and place it like this
Open – Hy- Deko - Hy_Welcome2022_Deko
Edit / Copy
Activate your work
Edit / Paste as New Layer
place as in the picture
Open – Hy- Tube - yp_tatty_teddy_christmas_carol
Edit / Copy
Activate your work
Edit / Paste as New Layer
Image –Resize-By Percentage 50
(Resize all layer not chaked)
Activate Pick Tool
and place it like this
Open – Hy- Tube - snowman-christmas
Edit / Copy
Activate your work
Edit / Paste as New Layer
Activate Pick Tool
and place it like this
Open – Hy- Text - Hy_Welcome2022_Text
Edit / Copy
Activate your work
Edit / Paste as New Layer
Activate Pick Tool
and place it like this
Open – Hy- Text - Hy_Welcome2022_Text_1
Edit / Copy
Activate your work
Edit / Paste as New Layer
Activate Pick Tool
and place it like this
Open – Hy- Deko - Hy_Welcome2022_star
Edit / Copy
Activate your work
Edit / Paste as New Layer
Activate Pick Tool
and place it like this
Layers – New Raster Layer
Effects - Vanderlee - Snowflakes v1
Open – Hy- Deko - Hy_Welcome2022_gift box
Edit / Copy
Activate your work
Edit / Paste as New Layer
Activate Pick Tool
and place it like this
Edit - Copy Special - Copy Merged
Open - Hy_Tube - Hy_Welcome2022_Frame02
Edit - Paste Into Selection
Selections - Select None
Put Your Watermarkt
Image - Resize 900
Save JPEG
Thank you very much Aynur for the test.


Thank you very much to everyone for these nice versions


Hiç yorum yok:
Yorum Gönder