
If you use it with other images, please write my name to avoid unpleasant discussions and respect my request.
Thanks
This tutorial is written in PSP x8
Tube
2550 - woman - LB TUBES
By Lily
Plugins
AV Bros - AV Bros.Page Curl Pro 2.2
Mehdi – Sorting Tiless
Simple – Diamonds
VanDerlee - Unplugged-x
Carolaine And Sensibilitye
Effects - Alien Skin Eye Candy : 5 Impact
AAA Frame
VanDerlee - Unplugged-x
Carolaine And Sensibilitye
Effects - Alien Skin Eye Candy : 5 Impact
AAA Frame
Mask
LF-Mask-194
Mask-Gabry 122
Mask-Gabry 122
Hüzünlüyıllar
Download link
Annabel Tutorial
Thank you very much for the translation
pinuccia

Thank you very much for the translation
pinuccia

Thank you very much for the translation
Download link
Annabel Tutorial
Thank you very much for the translation
pinuccia
Thank you very much for the translation
pinuccia
Thank you very much for the translation
Angela

Thank you very much for the translation
Kniri
 Preparation:
Thank you very much for the translation
Kniri
Choose a light and a dark color from your tube
Properties Foreground; set your Foreground color to #7c7c7c
Properties Background; set your Background color to #000000
Properties foreground: Make a foreground- background Gradient of these two colors
Note: When working with your own colors, play with the Blend Mode and/or Opacity at your own discretion
#7c7c7c #000000 #e44b40
#7c7c7c #000000 #e44b40
1-File / New - Open 900 x 550 Transparent Image
Flood fill - Fill With your Background color #000000 
2-Layers – New Raster Layer
Flood fill - Fill With your Foreground color #7c7c7c
3-Effects - AV Bros - AV Bros.Page Curl Pro 2.2

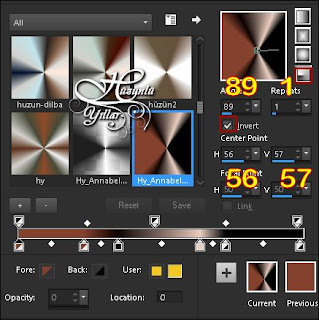
Go to Main,Click Load Settings


4-Effects – Image Effects – Seamless Tiling

5-Effecst – Edge Effects - Enhance
6-Effects – Image Effects – Seamless Tiling

7-Layers – New Raster Layer
Flood fill - Fill With your Gradient ( Hy_Annabel_Gradient.grd )
Flood fill - Fill With your Gradient ( Hy_Annabel_Gradient.grd )

8-Effects – Mehdi – Sorting Tiless

9-Effects – Edge Effects - Enhance
Layer Palette - Double click on this Layer and set the Blend Mode to "Soft Light" ( Overlay )
Foreground #e44b40
Background #000000
10-Layers – New Raster Layer
Flood fill - Fill With your Gradient
 11-Adjust – Blur – Radial Blur


12-Effects – Simple – Diamonds
13-Effects – Image Effects – Seamless Tiling

14-Effecst – Edge Effects – Enhance
Layer Palette - Double click on this Layer and set the Blend Mode to "Hard Light"
15-Selections - Load/Save Selections - Load Selection From Disk – Hy_Annabel_Sell
16-Selections – Promote Selection to Layer
17-Seletions – Select None
18-Effecst – VanDerlee - Unplugged-x - Defokus

19-Effects – Edge Effects – Dilate
20-Effects - Carolaine And Sensibilitye - CS-Dlines

Layer Palette - Double click on this Layer and set the Blend Mode to "Dodge"
21-Adjust –Sharpness – Sharpen more
22-Layers – Duplicate
23-Image – Mirror – Mirror Horizontal
Image – Mirror – Mirror Vertical
24-Layers – Merge – Merge Visible
25-Layers – New Raster Layers
Flood Fill Tool - Fill With Your Background Color #FFFFFF
26-Open - Hy-Annabel_Mask - LF-Mask-194

27-Layers - Merge - Merge Group
Flood Fill Tool - Fill With Your Background Color #FFFFFF
31-Open - Hy-Annabel_Mask - Hüzünlüyıllar_01

32-Layers - Merge - Merge Group
Layer Palette - Double click on this Layer and set the Blend Mode to "Dodge"
33-Layers – New Raster Layers
Flood Fill Tool - Fill With Your Background Color #FFFFFF
34-Open - Hy-Annabel_Mask - Mask-Gabry 122

35-Layers - Merge - Merge Group
Paint brush

Look for the brush - Hy_Annabel_Brush
and place it on your image as in the example with your background colour #FFFFFF
Flood Fill Tool - Fill With Your Background Color #FFFFFF
26-Open - Hy-Annabel_Mask - LF-Mask-194
27-Layers - Merge - Merge Group
28-Selections - Load/Save Selections - Load Selection From Disk – Hy_Annabel_Sell_1
press delete key on keyboard ( 4 + 5 Times )
29-Seletions – Select None
Layer Palette - Double click on this Layer and set the Blend Mode to "Dodge" Opacity 55
30-Layers – New Raster LayersLayer Palette - Double click on this Layer and set the Blend Mode to "Dodge" Opacity 55
Flood Fill Tool - Fill With Your Background Color #FFFFFF
31-Open - Hy-Annabel_Mask - Hüzünlüyıllar_01
32-Layers - Merge - Merge Group
Layer Palette - Double click on this Layer and set the Blend Mode to "Dodge"
33-Layers – New Raster Layers
Flood Fill Tool - Fill With Your Background Color #FFFFFF
34-Open - Hy-Annabel_Mask - Mask-Gabry 122
35-Layers - Merge - Merge Group
36-Image – Mirror – Mirror Horizontal
Layer Palette - Double click on this Layer and set the Blend Mode to "Dodge"
37-Layers – New Raster LayersLayer Palette - Double click on this Layer and set the Blend Mode to "Dodge"
Paint brush
Look for the brush - Hy_Annabel_Brush
and place it on your image as in the example with your background colour #FFFFFF

38-Layers - Duplicate
39-Image – Mirror – Mirror Horizontal
Place with move tool
49-Selections - Invert
press delete key on keyboard
50-Again - Selections - Invert
51-Effects - Alien Skin Eye Candy : 5 Impact – Glas - Hy_Annabel_Glas
52-Effects - Alien Skin Eye Candy : 5 Impact – Perspective Shadow - Hy_Annabel_Pers Shadow
53-Seletions – Select None
54-Effects - 3D Effects - Drop Shadow - Vertical 7 - Horizontal 7 - Opacity 67 - Blur 5 - Color #000000
Layers Duplicate
55-Image – Mirror – Mirror Horizontal
40-Layers – Merge – Merge Down
41-Open – Hy-Annabel_Tube_Deko - Hy_Annabel_Deko
42-Edit / Copy
activate your work
43-Edit / Paste As New Layer
Press K on your keyboard to activate the Pick Tool
44-Enter these parameters for the ( Positions X 104,00 ) and ( Positions Y 19,00 ) Positions on the Toolbar
Hit any key on your keyboard to close the Pick Tool
Foreground #e44b40
Background #000000
Foreground #e44b40
Background #000000
45-Layers – New Raster Layers
46-Selections - Load/Save Selections - Load Selection From Disk – Hy_Annabel_Sell_2
46-Selections - Load/Save Selections - Load Selection From Disk – Hy_Annabel_Sell_2
Flood fill - Fill With your Gradient
47-Selections - Load/Save Selections - Load Selection From Disk – Hy_Annabel_Sell_3
48-Open - Hy_Annabel_Tube_Deko - Hy_Annabel_ImajPlace with move tool
49-Selections - Invert
press delete key on keyboard
50-Again - Selections - Invert
51-Effects - Alien Skin Eye Candy : 5 Impact – Glas - Hy_Annabel_Glas
52-Effects - Alien Skin Eye Candy : 5 Impact – Perspective Shadow - Hy_Annabel_Pers Shadow
53-Seletions – Select None
54-Effects - 3D Effects - Drop Shadow - Vertical 7 - Horizontal 7 - Opacity 67 - Blur 5 - Color #000000
Layers Duplicate
55-Image – Mirror – Mirror Horizontal
Image – Mirror – Mirror Vertical
56-Layers - Merge - Merge Down
57-Open – Hy-Annabel_Tube_Deko - Hy_Annabel_Deko_1
58-Edit / Copy
activate your work
59-Edit / Paste As New Layer
60-Open – Hy-Annabel_Tube_Deko - Hy_Annabel_Deko_2
61-Edit / Copy
activate your work
62-Edit / Paste As New Layer
56-Layers - Merge - Merge Down
57-Open – Hy-Annabel_Tube_Deko - Hy_Annabel_Deko_1
58-Edit / Copy
activate your work
59-Edit / Paste As New Layer
60-Open – Hy-Annabel_Tube_Deko - Hy_Annabel_Deko_2
61-Edit / Copy
activate your work
62-Edit / Paste As New Layer
Press K on your keyboard to activate the Pick Tool
63-Enter these parameters for the ( Positions X Minus -1,00 ) and ( Positions Y 255,00 ) Positions on the Toolbar 225
Hit any key on your keyboard to close the Pick Tool
64-Open – Hy-Annabel_Tube_Deko - Hy_Annabel_Text
65-Edit / Copy
activate your work
66-Edit / Paste As New Layer
Press K on your keyboard to activate the Pick Tool
67-Enter these parameters for the ( Positions X 167,00 ) and ( Positions Y Minus -4,00 ) Positions on the Toolbar
64-Open – Hy-Annabel_Tube_Deko - Hy_Annabel_Text
65-Edit / Copy
activate your work
66-Edit / Paste As New Layer
Press K on your keyboard to activate the Pick Tool
67-Enter these parameters for the ( Positions X 167,00 ) and ( Positions Y Minus -4,00 ) Positions on the Toolbar
Hit any key on your keyboard to close the Pick Tool
68-Open – Hy-Annabel_Tube_Deko - 2550 - woman - LB TUBES
69-Edit / Copy
activate your work
70-Edit / Paste As New Layer
Press K on your keyboard to activate the Pick Tool
68-Open – Hy-Annabel_Tube_Deko - 2550 - woman - LB TUBES
69-Edit / Copy
activate your work
70-Edit / Paste As New Layer
Press K on your keyboard to activate the Pick Tool
71--Enter these parameters for the ( Positions X 470,00 ) and ( Positions Y 9,00 ) Positions on the Toolbar
Hit any key on your keyboard to close the Pick Tool
72-Image - Add Borders - Symmetric, 1 pixel, color #e44b40
73-Image - Add Borders - Symmetric, 1 pixel, color #000000
74-Image - Add Borders - Symmetric, 1 pixel, color #e44b40
75-Image - Add Borders - Symmetric, 10 pixel, color #000000
76-Image - Add Borders - Symmetric, 1 pixel, color #e44b40
77-Image - Add Borders - Symmetric, 1 pixel, color #000000
78-Image - Add Borders - Symmetric, 35 pixel, color #e44b40
79-Effects - AAA Frames - Foto Frame

80-Put Your Watermarkt
81-Image Resize – By Pixels - 900
Save JPEG


Thank You Pinuccia

Thank You Angela

Thank you very much to everyone for these nice versions


